
You can go to print label screen from multiple places:
• From Products Sidebar menu Products -> Print Labels.
• Go to Products -> View Products and click on Actions -> Labels. This will add the selected product to print label list.
• Go to Purchases -> List Purchases and click on Actions -> Labels. This will add the products from the selected purchase to print label list.
Printing Labels
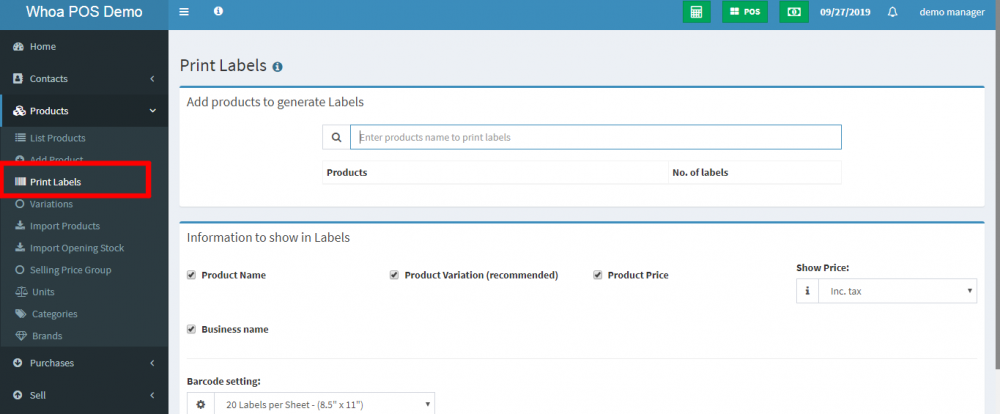
1. Once you’re in print label screen, add the products for which you want to print labels by entering the name or barcode/sku id.
2. Adjust the quantity of each product’s label (No. of labels).
3. Select the information you want to display in labels by checking/unchecking the options under “Information to show in labels” heading.
4. Select the Barcode Setting according to your sticker. We have included some commonly used settings.
You can add new setting from Settings -> Barcode Settings menu.
5. Click on Preview to view the labels.
6. If everything looks good you can click on Print button to print it.
Note: You must set the Margins to ‘default’ in browser print window.
7. If some information is getting half displayed because of sticker size, then it is advised to hide them or better to use a 20 Labels Per sheet settings.
Post your comment on this topic.